一、环境搭建篇
(一)安装JDK
大家自行安装
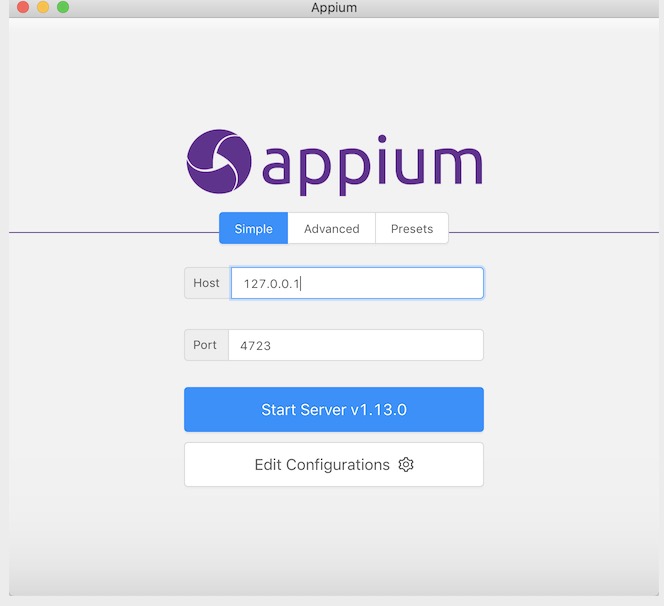
(二)安装Appium
1、appium desktop
下载地址:https://bitbucket.org/appium/appium.app/downloads/,下载一个当前最新版就可以
2、appium server
> brew install node # get node.js
> npm install -g appium # get appium
> npm install wd # get appium client
> appium & # start appium
> node your-appium-test.js
(三)iOS真机环境配置
1、Homebrew
如果没有安装过Homebrew,先安装 [ homebrew ]
2、npm
如果没有安装npm,请移步 [ node.js和npm安装 ]
3、安装依赖库
brew install libimobiledevice --HEAD #可获取ios真机设备的信息
sudo npm install -g ios-deploy --unsafe-perm=true #如果要在iOS10+的系统上使用appium,则需要安装ios-deploy
brew install carthage
brew install usbmuxd
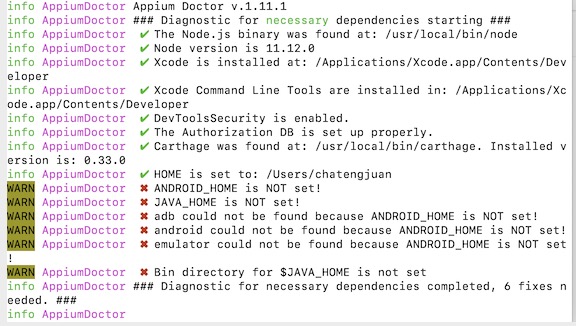
4、appium-doctor 安装
npm install appium-doctor -g
安装后执行appium-doctor –ios指令,可以查看与iOS相关配置是否完整,下图是全部配置都成功,如果出现有一项不正确在执行一次就可以,或者直接跳过
appium-doctor –ios
5、更新Appium中的WebDriverAgent
1)下载webdriveragent https://github.com/appium/WebDriverAgent.git
git clone https://github.com/appium/WebDriverAgent.git
2)cd 进入下载后的WebDriverAgent文件
3)执行 ./Scripts/bootstrap.sh
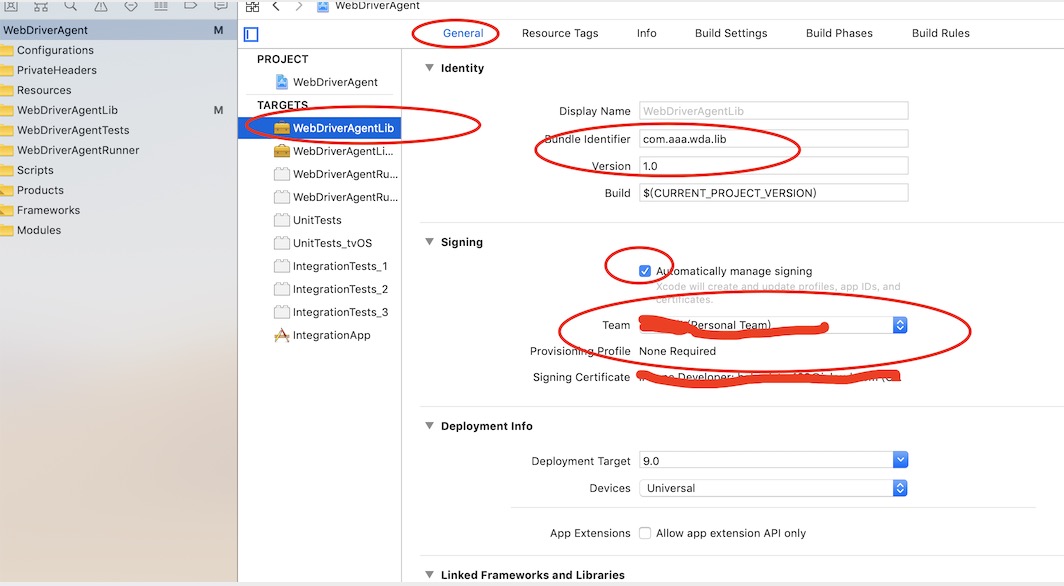
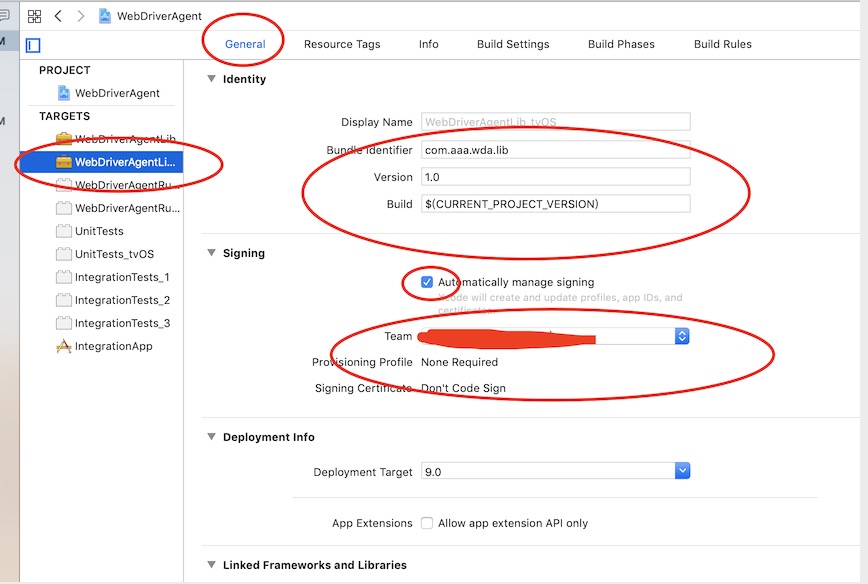
4)用Xcode打开WebDriverAgent.xcodepro文件
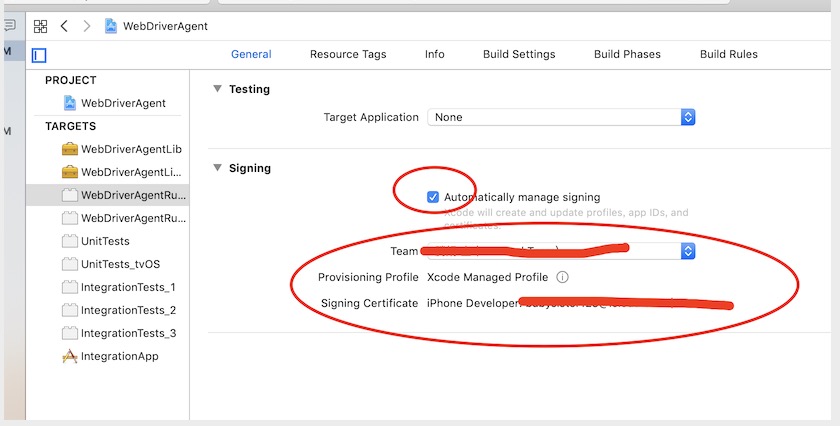
配置WebDriverAgentLib和WebDriverAgentRunner的证书
如图所示配置,
修改bundleid ,随便修改,只要不跟已经注册过的冲突就行了,要求唯一
team选择真实的开发者账号
手机连上电脑
选择自己的手机
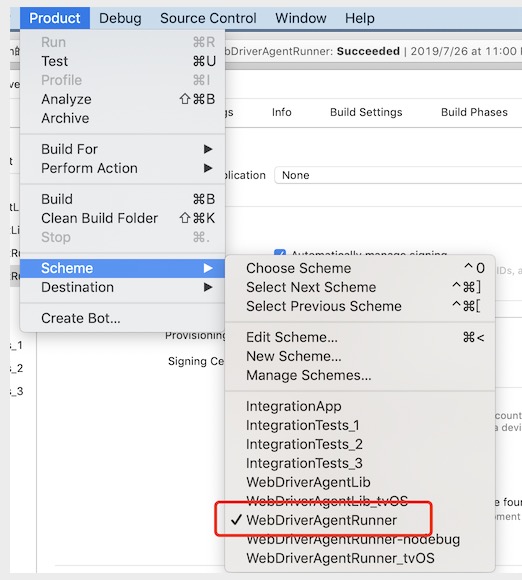
然后点击test运行
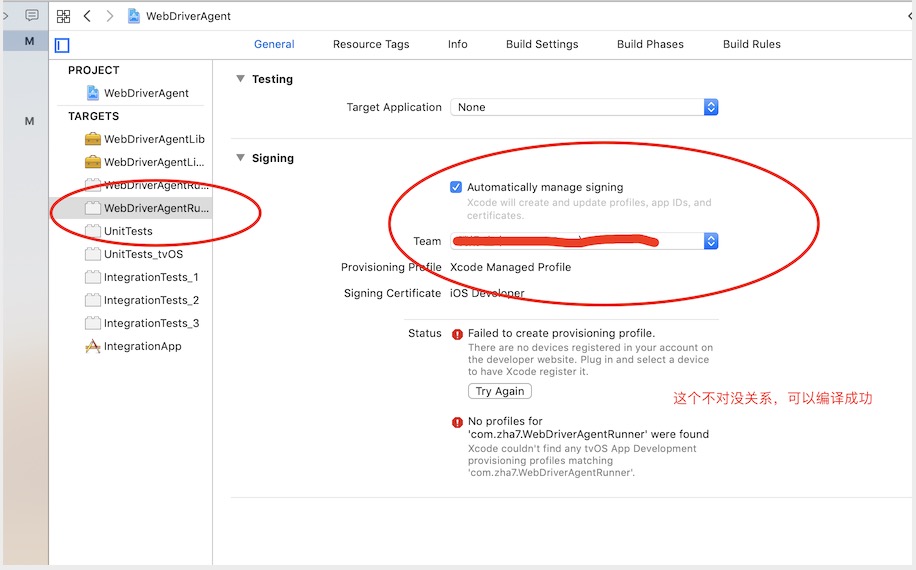
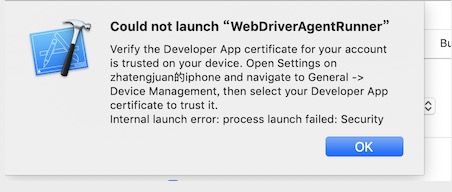
如果出现如下图错误,在ios设备-设置-通用-描述文件和设备管理,信任一下开发者,再次test运行就不会出现错误了
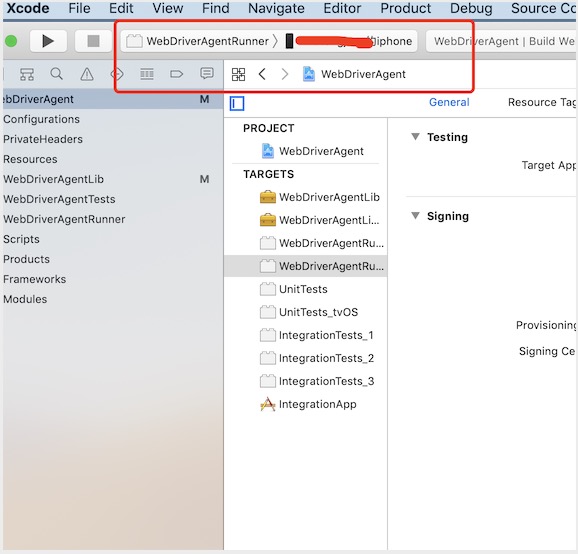
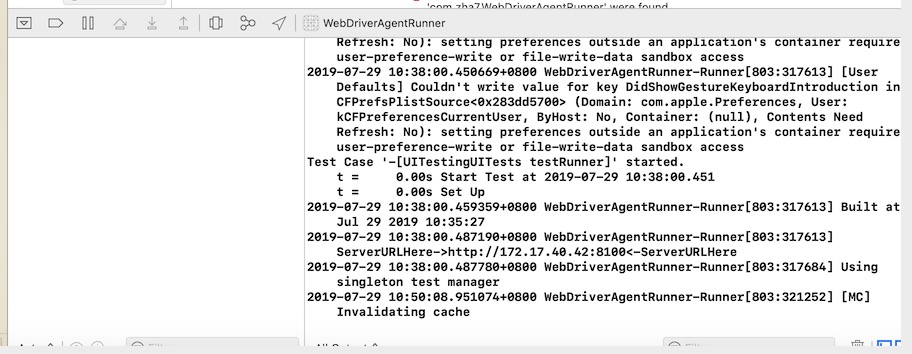
运行成功后,在xcode控制台可以打印出ip地址和端口号
进入到Appium中的WebDriverAgent目录,目录路径如
/Applications/Appium.app/Contents/Resources/app/node_modules/appium/node_modules/appium-xcuitest-driver/
将自己下载并编译后的WebDriverAgent替换Appium原有的WebDriverAgent
(六)利用Appium-Python-Client进行iOS的自动化测试
这一步是将python与appium关联起来
在终端输入:pip install Appium-Python-Client,安装即可
(七)Appium中开启iOS webview调试进行h5自动化测试
在做ios的h5页面测试时,测试包必须要使用develop证书打包,app要是debug包,才可以进行真机测试
实践:如果在ios真机的webview页面执行appium自动化,需要做以下准备:
1)安装 ios_webkit_debug_proxy,在执行webview自动化时必须启动该服务
http://appium.io/docs/en/writing-running-appium/web/ios-webkit-debug-proxy/index.html
a.brew install ios-webkit-debug-proxy
2)运行ios-webkit-debug-proxy
a.官方提供的命令:ios_webkit_debug_proxy -c UUID:27753 -d
b.使用chrome dev-tools调试
i.运行命令
ios_webkit_debug_proxy -f chrome-devtools://devtools/bundled/inspector.html
ii.根据日志提示,获得端口并打开页面对应端口页面,如lcoalhost:9221
iii.点击设备提示拷贝链接到地址栏即可访问;
c.使用safari调试
i.打开mac上的safari浏览器开发者模式
ii.打开设备上的webview页面
iii.点击safari浏览器菜单中的开发-device,选择进程;
在appium中使用ios-webkit-debug-proxy :
第一种方式:set the desired capability,加上"startIWDP": true,
// example desired capabilities
{
"browserName": "Safari",
"platformName": "iOS",
"deviceName": "iPhone 7",
"automationName": "XCUITest",
"startIWDP": true,
"udid": "auto"
}
第二种方式:直接手动启动ios-webkit-debug-proxy,然后再执行自动化,注意此时需要制定端口27753(appium默认iwdp端口为这个)以及设备ID,即
ios_webkit_debug_proxy -c 17d5c2ae122f79a23fbd29168e0948dce22e8ce5:27753 -d
二、元素定位方法篇
(一)通过weidtor定位元素
1)安装
终端中输入,安装weditor
pip install weditor
2)启动
注意:先要运行webdriveragent
然后终端输入命令:python -m weditor
点击connect后,出现手机画面,reload是同步手机画面
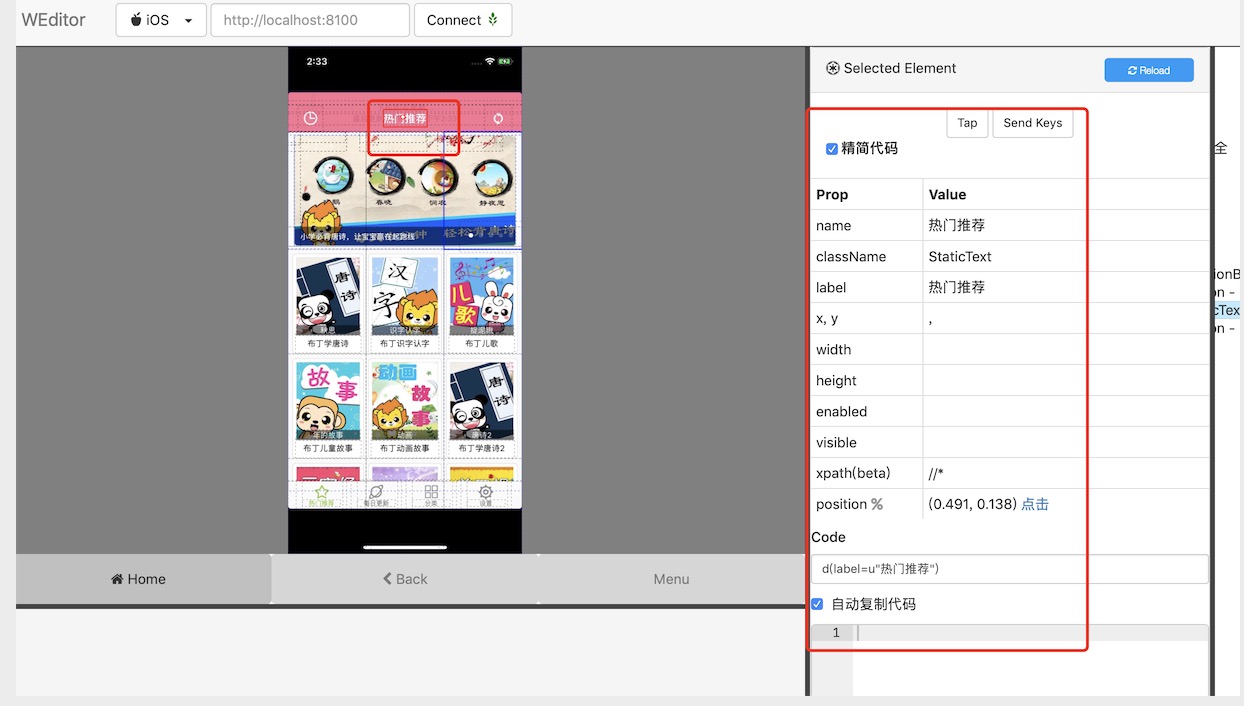
点击界面元素,右侧出现该元素的定位信息
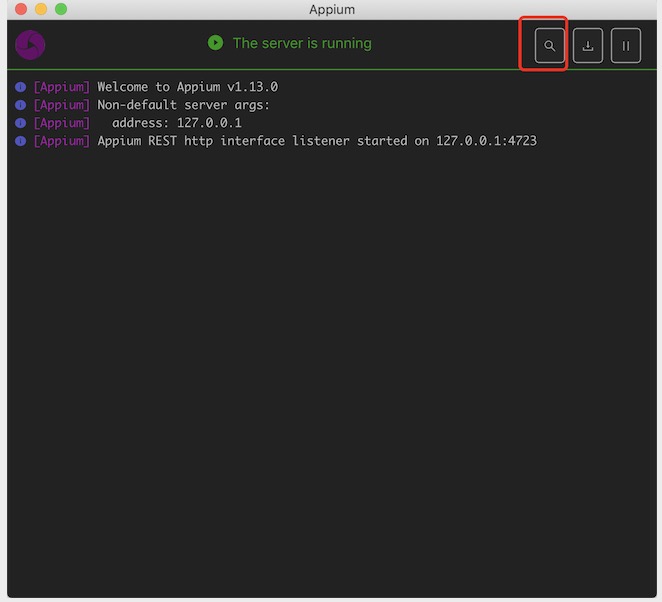
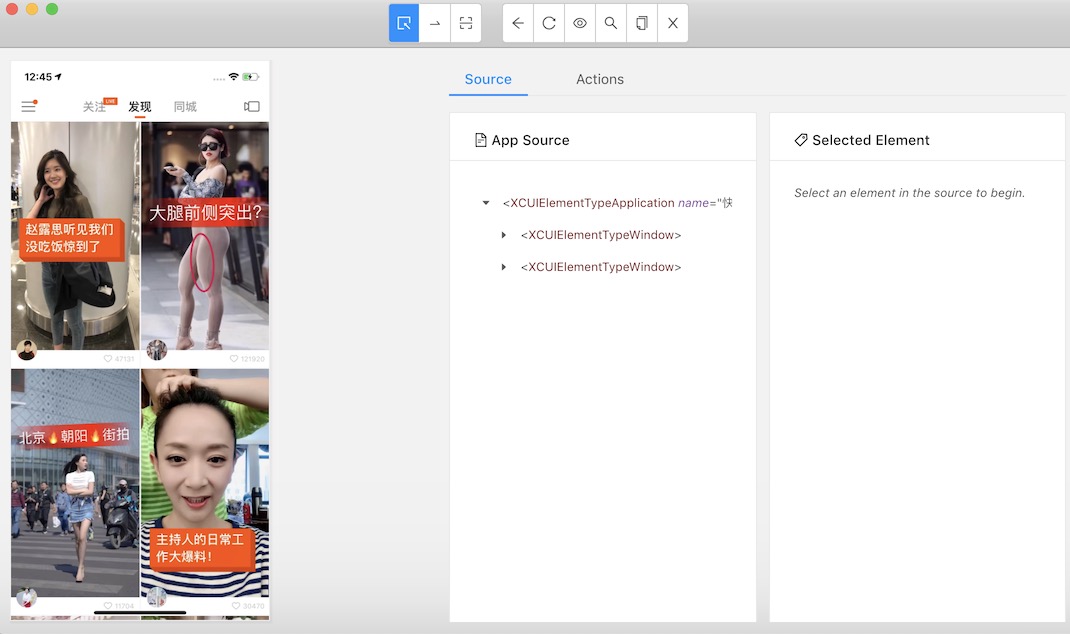
(二)通过appium desktop定位
1、运行Appium-Desktop ,点击start server,开启server
2、点击Start Inspector Session按钮
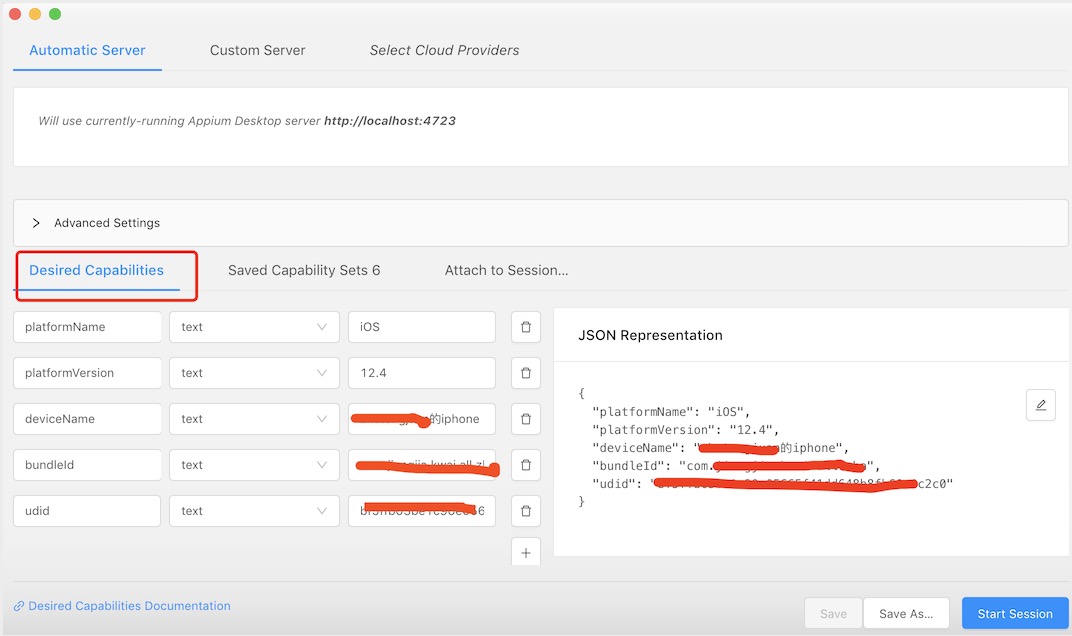
3、配置Desired Capabilities
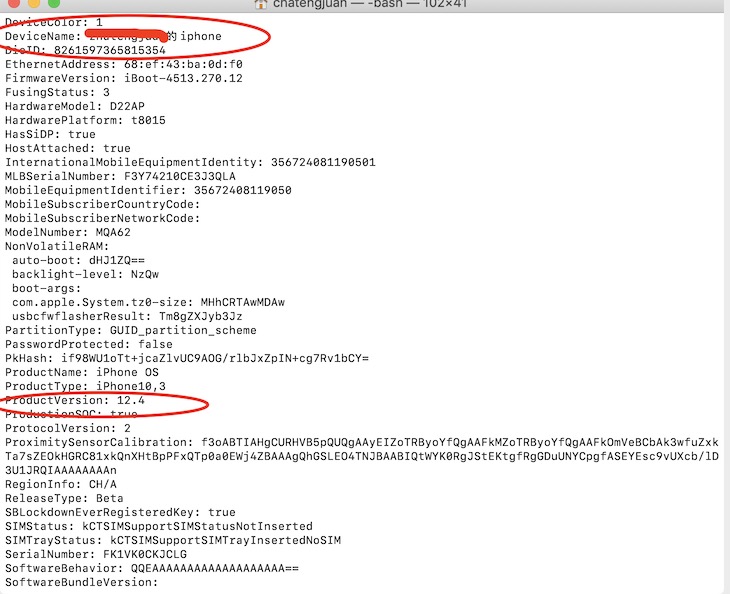
如何获取设备信息?
设备连接上电脑,然后在终端输入idevice_id -l,就可以显示当前设备的udid

ideviceinfo 显示当前设备的信息,可以查看当前的deviceName, platformName
SHAPE \* MERGEFORMAT
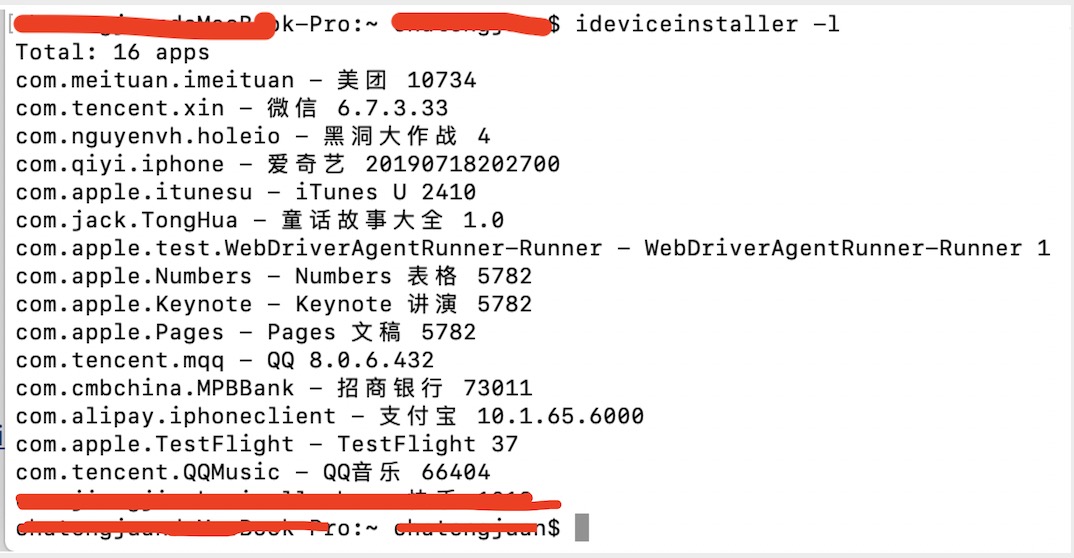
ideviceinstaller -l 查看当前设备所有安装的app的信息
配置好信息后,点击start session
运行成功后,会弹出一个控制界面,在该界面中可以控制手机上正在运行的程序 ,可以定位元素
三、python+appium+ios,自动化测试实践
(一)新建文件test.py
(二)简单自动化脚本编写
#encoding=utf-8
import time
import os
import unittest
from appium import webdriver
#初始化
class MyTestCase(unittest.TestCase):
def setUp(self):
desired_caps = {
'platformName': 'iOS',
'deviceName': 'iphone',
'platformVersion': '12.4',
'bundleId' : 'com.jack.TongHua',
'udid' : 'bf5ffb03be1c90e05665f41dd648b8fb60a0c2c0', 'startIWDP':'true'
}
# 初始化驱动
self.driver=webdriver.Remote('http://127.0.0.1:4723/wd/hub', desired_caps)
def testRefresh(self):
#点击刷新按钮
self.driver.find_element_by_accessibility_id("btn update").click()
def tearDown(self):
#退出
self.driver.quit()
if __name__ == '__main__':
unittest.main()
1、对类MyTestCase添加setUp函数(这是测试用例执行前的准备动作,负责告诉appium监听那个端口、与那个手机连接、安装那个应用等信息)
2、对类MyTestCase添加TearDown函数(这是测试用例执行结束后的动作,可以执行保存执行结果等操作)
(三)脚本写好后,先要运行webdriveragent
方法一:用xcode的运行webdriveragent
方法二:使用命令行运行webdriveragent
先切到webdriveragent目录下,然后输入 xcodebuild -project WebDriverAgent.xcodeproj -scheme WebDriverAgentRunner -destination id='bf5ffb03be1c90e05665f41dd648b8fb60a0c2c0' test
(四)执行自动化测试脚本
(五)pyhton+appium+iOS,遍历真机的webview
1、运行ios_webkit_debug_proxy
ios_webkit_debug_proxy -c bf5ffb03be1c90e05665f41dd648b8fb60a0c2c0:27753 -d
2、driver.contexts获得页面所有context,这个方法会将context存在list里,打印出list内容,查看你要的webview在第几个,用switch_to.context()切换到那个webview即可,代码如下
# 假设我的目标webview存在list里的第三个
myWebview = self.driver.context[2]
self.driver.switch_to.context(myWebview)
这样就切换到了目标webview,接下来就可以像web自动化一样,操作html元素了。
3、怎么得到元素属性
1).启动webkit服务,并指定谷歌浏览器进行监听
ios_webkit_debug_proxy -f chrome-devtools://devtools/bundled/inspector.html
2).运行用例代码,停留在含webview的页面
3).谷歌浏览器地址输入http://127.0.0.1:92223,就可以看到手机的webview url
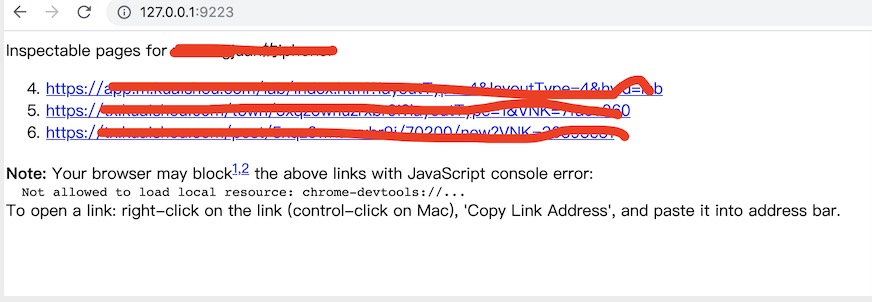
4)将url复制出来,就可以像定位web元素一样去定位h5元素

